MeshCore Repeater Setup
This guide walks through the full repeater workflow: choose or build a MeshCore-compatible repeater node, flash and configure it over USB, then finish programming it from your phone using a separate companion node.
A repeater is the fixed radio that stays installed to relay traffic for the mesh. A companion is a second node you use to reach and manage that repeater from the MeshCore mobile app. The flow here is: build if needed, flash and configure over USB, test companion-based setup, then deploy the node.
Already familiar with MeshCore? Skip to the command-line setup →
Table of Contents
- Before You Start
- Guide Organization
- What You Will Need Overall
- Build the Repeater Node
- Build Requirements
- Prepare the Enclosure
- Mount the Solar Hardware
- Install the Radio Hardware
- Finish the Physical Assembly
- Flash the Repeater Node
- Flash Requirements
- Option 1: MeshCore Web Flasher
- Option 2: Flash ESP32 Devices with esptool.py
- Option 3: Flash RAK Devices with UF2
- Configure the Node Over USB
- Programming with a Companion
- Programming Requirements
- Program the Repeater
- Set Core Mesh Settings
- For Seasoned MeshCore Users: Command-Line Setup
- Deploy the Node
- Choose a Good Site
- Tree Mounting
- Structure or Pole Mounting
- Other Mounting Options
- Power Saving Addendum
Before You Start
How This Guide Is Organized
Start with the build section if you are assembling a repeater from parts. If you already have a finished repeater or an off-the-shelf device, begin at the flash section instead.
What You Will Need Overall
- A MeshCore-compatible repeater device. Common choices include a Heltec LoRa 32 V4, RAK4631-based build, or another off-the-shelf or already-built MeshCore-capable node.
- A second companion node for programming and day-to-day access to the repeater. Common companion nodes include a LILYGO T-Echo, Heltec LoRa 32 V4, or RAK4631 portable build.
- Your phone with the MeshCore mobile app installed: Android / iPhone
- A laptop or desktop computer for the flashing and USB configuration steps
- A USB programming cable for your node, with USB-C being a common connector on many devices
- A drill with a step bit, a bit sized for the solar wire, wire strippers, and outdoor waterproof sealant
Build the Repeater Node
If you already have a repeater build or a ready-made device, skip this section and go straight to Flash the Repeater Node.
What You Will Need
- A MeshCore-compatible repeater device or a parts build based on the linked repeater parts list
- A drill with a step bit, a bit sized for the solar wire, wire strippers, zip ties, and outdoor waterproof sealant
- Your enclosure, antenna, battery, solar panel, JST pigtail, and mounting hardware
Prepare the Enclosure
- Drill the top of the enclosure for the N-type bulkhead connector. Test-fit as you go so the hole stays snug.
- Drill the bottom for the solar panel cable input. This opening can also act as a pressure vent.
Mount the Solar Hardware
- Mount the solar panel where it gets reliable sun. If you are mounting it to the case, leave enough wire slack for the door to open without pulling on the cable.
- Splice the panel lead to the included JST pigtail from the Heltec box.
Install the Radio Hardware
- Install the N-type bulkhead, attach the antenna to the bulkhead, and connect the radio to the IPEX lead.
- If you are using a screenless V4, attach the included Bluetooth/Wi-Fi antenna.
Finish the Physical Assembly
- After programming is complete, connect the battery and solar lead, then secure the board and battery with zip ties.
- Seal the bulkhead opening and any other penetrations with outdoor waterproof sealant before deployment.
Flash the Repeater Node
This is the point where everyone should start if the repeater hardware already exists.
What You Will Need
- A laptop or desktop computer
- A USB data cable for the repeater device
- A Chromium-based browser with WebSerial support such as Google Chrome, if using the web flasher
- Or a local Python environment with
esptool.py, if flashing manually
An optional power-saving mode is covered in the addendum at the bottom of this guide.
Option 1: MeshCore Web Flasher
- Connect the radio to your computer and open flasher.meshcore.io.
- Use a Chromium-based browser such as Chrome so the site can access the radio over USB.
- Load the correct firmware for your hardware and complete the flash.
Option 2: Flash ESP32 Devices with esptool.py
- Download the correct firmware file for your repeater hardware from the MeshCore GitHub releases page.
- Install
esptool.pyif needed. - Put the repeater device into bootloader mode if your hardware requires it.
- Identify the serial port for the device, then flash the firmware with a command like:
esptool.py --chip esp32 --port /dev/ttyUSB0 --baud 460800 write_flash -z 0x0 firmware.bin- Adjust the serial port, chip target, and firmware filename to match your hardware.
Option 3: Flash RAK Devices with .uf2
- Download the correct
.uf2firmware file for your RAK device from the MeshCore GitHub releases page. - Put the device into the appropriate USB programming mode. Depending on the model, this may mean holding reset while plugging in USB, or holding the boot button while connecting the USB cable.
- If a USB flash drive appears, copy the
.uf2firmware file onto that drive and allow the device to reboot when the copy finishes. - On some devices you may need to temporarily disconnect the battery during programming.
- Check the instructions for your exact device and make sure you selected the correct firmware image for that model.
Configure the Node Over USB
After flashing by any supported method, finish the initial repeater configuration over USB before trying to complete setup through the companion.
- Go to meshcore.io and click Repeater Setup using the gear icon next to it. This opens the Repeater / Room server USB setup page at
config.meshcore.io. - In the upper-right corner of that page, click Connect.
- When the browser asks which serial device to use, select your repeater. This is often the top device in the list.
- Set the repeater name.
- Set Owner info only if you want public contact details attached to the repeater. An email address, ham radio callsign, and/or Discord username are good options. This field is publicly shared and has a 119 byte limit.
- Set the repeater location by clicking the map button, or by copying and pasting latitude and longitude from your web browser for the intended repeater site. Location is optional; you can leave it blank or use a point in the general area, such as roughly 2 km away from the actual site, for privacy if desired.
- Under Access, set a new admin password. This is recommended because it lets you further configure the repeater later from the mobile app for more advanced settings.
- Leave Guest password empty unless you have a specific reason to enable it.
- Under Radio settings, set the preset to USA/Canada (Recommended).
- That preset defaults to: Frequency 910.525, Bandwidth 62.5, Spreading Factor (SF) 7, and Coding Rate (CR) 5.
- If you want additional error correction, you can increase CR as high as 8. This increases radio airtime substantially, nearly doubling it, and can reduce battery life.
- Your device instructions will often specify the correct TX Power setting. Never set TX power above 30 dBm, which is the FCC limit in the United States.
- Under Advertising, adjust the values as needed. The UI shows fields for Advert interval (minutes), Flood advert interval (hours), and Flood max.
- Set Core Mesh Settings: While still connected over USB, use a serial command prompt to run the commands in Set Core Mesh Settings below. This configures path hashes, public-mesh advertising, the 12-hop unscoped limit, and CT regions before the device reboots.
- Click Save settings at the bottom, then reboot the device.
- You can leave location blank, or use coordinates in the general area (for example, roughly 2 km from the actual site) for privacy if desired.
- If you change the frequency, bandwidth, or spreading factor, the repeater will no longer communicate with nodes on the public mesh, which is usually not what you want.
- For the public mesh, set Flood advert interval (hours) to 47. The UI may default lower, such as 12, so change it before saving.
- For every public repeater, set the unscoped flood hop limit to 12. In the command line, run
set flood.max.unscoped 12. This limits traffic using the unscoped*region while retaining normal public-mesh forwarding.
Programming with a Companion
What You Will Need
- The flashed repeater node
- A separate companion node that can hear and manage the repeater
- Your phone with the MeshCore Android or iPhone app installed
Program the Repeater
- Power on both devices: the repeater and your separate companion node. Make sure the repeater is within range.
- Open the MeshCore app on your phone. In the upper right, tap the Bluetooth icon where it shows Connect.
- Choose your companion node from the devices shown and provide the Bluetooth code if needed.
- Once connected in the app, open the three-dot menu, tap Tools, then tap Discover Nearby Nodes, and then Discover repeaters.
- The repeater should be discovered quickly if it is powered on and in range. Add it as a contact. You can also favorite it if you want.
- Open the repeater contact, tap Manage, and enter the admin password.
- This opens the repeater admin status page. Tap Request status if you want to refresh and view the repeater status.
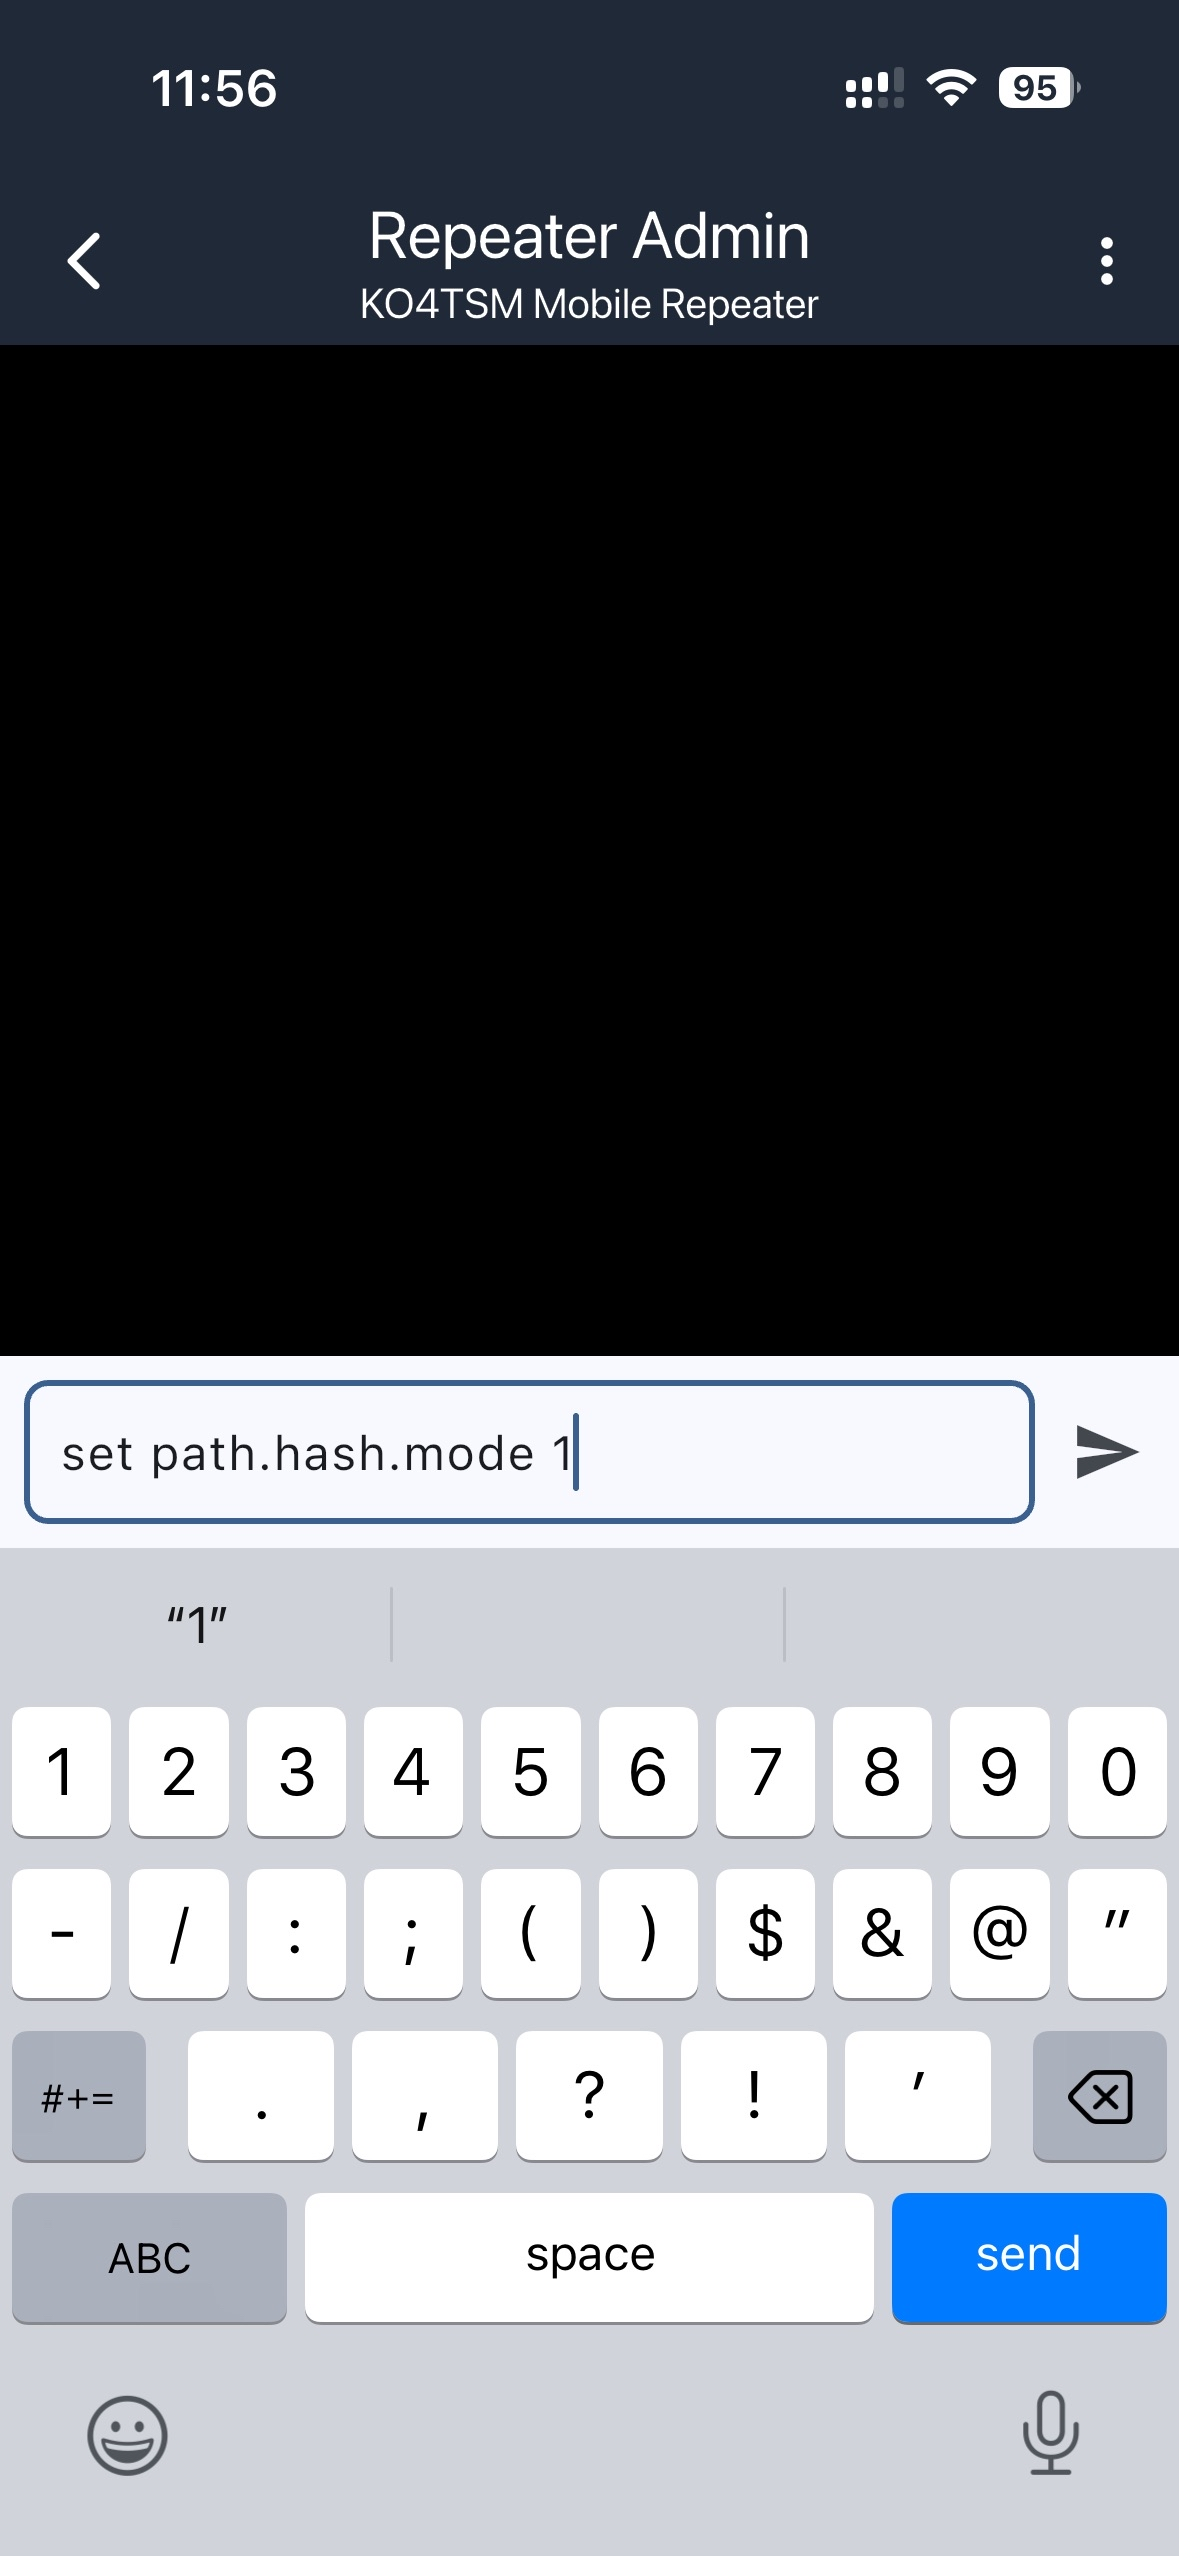
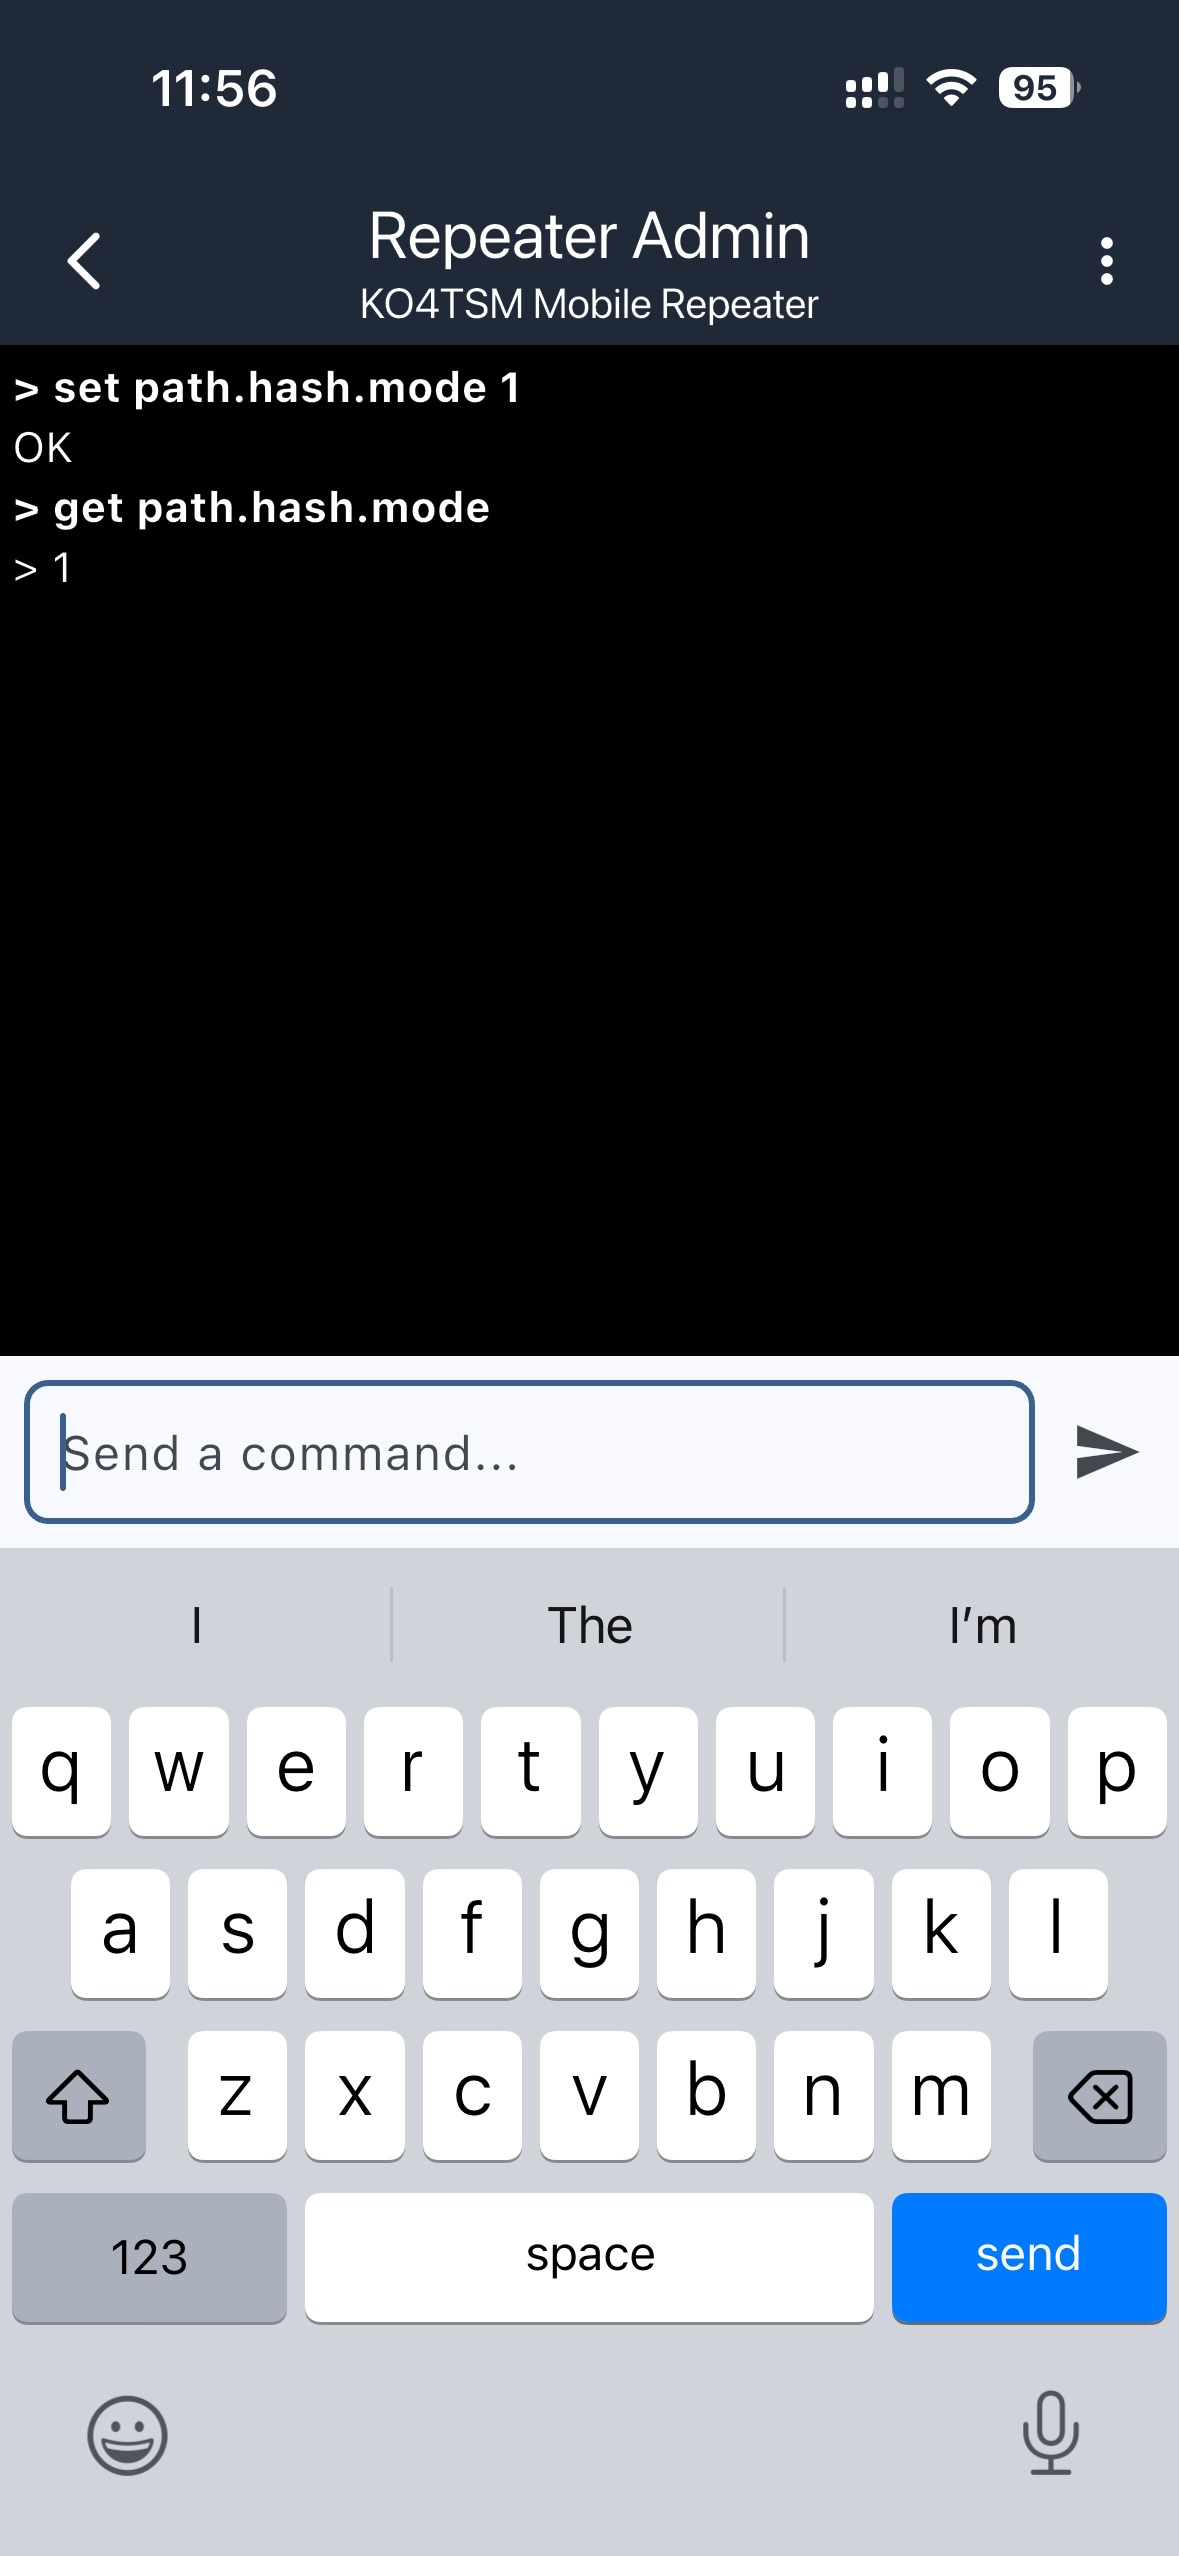
- At the bottom of that screen, open Command Line. View screenshot View result
- Tap the Settings icon in the bottom right next to Command Line to change other node settings such as advert intervals, owner info, position, syncing the device clock, and other access control or telemetry settings.
- Set Core Mesh Settings: From the command line, run the commands in Set Core Mesh Settings below. This configures path hashes, public-mesh advertising, the 12-hop unscoped limit, and CT regions.
- If the app has trouble reconnecting to the companion over Bluetooth, you may need to go into your phone's Bluetooth settings and forget the device before trying again.
- Syncing the clock on the device is recommended.
- 1 byte mode is not recommended because it can cause hash collisions.
- You can use
set path.hash.mode 2for 3 byte mode, but that reduces the hop limit from 32 hops in 2 byte mode to 21 hops in 3 byte mode.
Set Core Mesh Settings
Run these required public-mesh settings from the repeater command line. CT repeaters should use ct, northeast, and east. Add ct-rv only when the New England Mesh region map shows that your site is in that area.
set path.hash.mode 1
set flood.advert.interval 47
set flood.max.unscoped 12

region put ct
region allowf ct
region put northeast
region allowf northeast
region put east
region allowf east
# Add these two lines only when your site is in the ct-rv area:
# region put ct-rv
# region allowf ct-rv
region allowf *
region save
set path.hash.mode 1 selects 2-byte path hashes; set flood.max.unscoped 12 limits unscoped * traffic to 12 hops. Keep wildcard forwarding enabled with region allowf *. Use the New England Mesh map if you have questions about the regions expected at your repeater location.For Seasoned MeshCore Users: Command-Line Setup
This is a command-line alternative to the USB setup and companion-programming steps above. Replace every value in angle brackets with your own deployment information. For public owner info, an email address, ham radio callsign, and/or Discord username are useful contact options. Location is optional; omit it or use coordinates roughly 2 km from the actual site for privacy if desired. Confirm the correct TX power for your hardware before setting it.
set name <repeater-name>
# Optional public contact: email, callsign, or Discord
set owner.info <optional-public-contact-info>
# Optional location: omit, or offset about 2 km for privacy if desired
set lat <latitude>
set lon <longitude>
password <new-admin-password>
set radio 910.525,62.5,7,5
set tx <device-specific-tx-power-dbm>
set path.hash.mode 1
set flood.advert.interval 47
set advert.interval <optional-60-to-240-minute-interval>
set flood.max.unscoped 12

region put ct
region allowf ct
region put northeast
region allowf northeast
region put east
region allowf east
# Add these two lines only when your site is in the ct-rv area:
# region put ct-rv
# region allowf ct-rv
region allowf *
region save
reboot
ct, northeast, and east. Add ct-rv only for locations in that area. Refer to the New England Mesh region map to identify the expected regions for your repeater site or to ask regional coordination questions. The New England Mesh guide also recommends retaining wildcard forwarding with region allowf *.The public-mesh values in this block match the beginner guide: 2-byte path hashes, a 47-hour flood advert interval, and a 12-hop limit for unscoped * traffic. If you leave location blank for privacy, omit the set lat and set lon lines. See the official MeshCore CLI reference for the complete command set.
Deploy the Node
Choose a Good Site
- Choose a stable location with useful height, clear exposure, and enough sun to keep the battery healthy.
- If your radio site and panel site differ, remote panel placement is fine if it improves sun exposure.
Tree Mounting
For tree installs, a common approach is to use a slingshot to place a lightweight mason line over a suitable branch, then use that line to pull up a stronger rope for hoisting and securing the node. Choose a healthy branch, avoid power lines, and make sure the enclosure and antenna can hang clear without rubbing through on bark or hardware.
Structure or Pole Mounting
Nodes can also be attached to the side of a structure, a mast, a fence post, or a utility-style pole using appropriate brackets, hose clamps, or other weather-resistant mounting hardware. Keep the enclosure secure, keep cable runs tidy, and position the antenna with as much clear exposure as practical.
Other Mounting Options
Other logical mounting options include sheds, garages, balcony rails, old TV antenna mounts, rooftop masts, and similar elevated locations with stable support and useful line-of-sight.
Need More Context?
If you want help validating a parts list, firmware choice, or deployment location, ask in Discord before you seal everything up and mount it.
 Join CT Mesh Discord
Power Saving Addendum
If you are running a solar-powered repeater or otherwise want to reduce current draw, power saving is available as an optional post-setup change.
After logging into the repeater, open the command line and run powersaving on.
This can be useful for deployments where power budget matters, especially small solar installations.
If you want a lower-power firmware variant, you can also use the flasher's custom firmware option with releases from EasySkyMesh.
Back to CT Mesh